


Many people consider stereo slides to be the most immersive, impactful and transformative of the stereoscopic formats. The PARALLAX-SHIFT Stereo Club proudly boasts quite a number of actively practicing 35mm and medium format stereo shooters and we make sure to survive this highly endangered skill to every person that becomes interested in the stereo slide creating process.


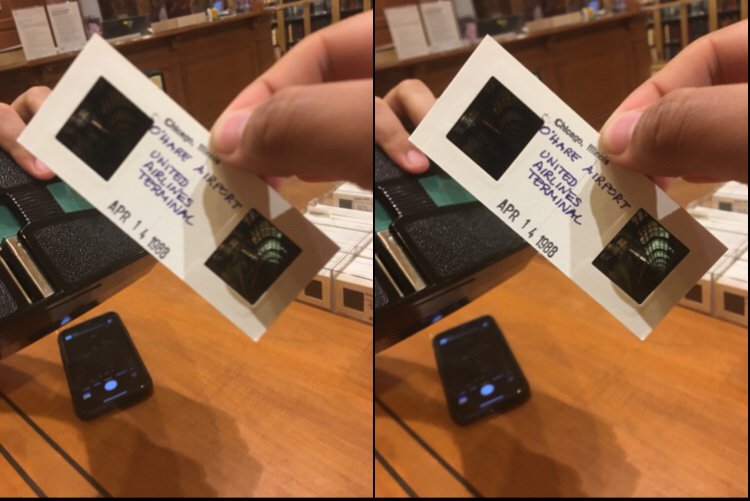


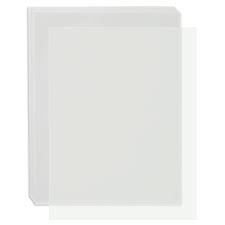
Stereo slide making is very much a labor of love. It’s an arduous and exacting task that requires patience, know how and precision, but the results are spectacular and can transport many viewers to the precise moment in time that your stereo photo pairs were shot in a way that seems to be exclusive to the formats. I have a Livestream archived on my Instagram reels that provides a rather preliminary overview of the workflow, general supplies needed and the variety of slide mounting options available. That video can be found in the link below.
Stereo slide mounting 101 on insta
One of the key skills involved in stereo slide making is the actual process of physically slicing stereo image pairs from a processed, uncut strip of film to manually extract a pair of Left & Right film chips to use as the L & R images in your 3D slide .
Regardless of whether you are shooting medium format or 35mm film, YOU MUST- I REPEAT MUST– INSTRUCT THE FILM PROCESSING LAB TO ONLY PROCESS AND DO NOT CUT.
“DO NOT CUT” IS THE STEREO SLIDE MAKERS MANTRA WHENEVER HANDING A ROLL OF FILM OVER TO A LAB FOR PROCESSING. DO NOT CUT. DO NOT CUT. DO NOT CUT. Thank you.
No matter what you shoot, when you process your film, you always request, in big bold sharpie marker- DO NOT CUT- when you are handing in your film.


You demand to decline cutting & printing services because stereo cameras do not shoot at normal frame sizes- no matter what stereo camera you shoot with- a 2 frame stereo like a realist, a 3 frame or 4 frame lenticular camera like an Imagetech or nishika- or any other of the funky frame size cameras we shoot with- if you try to get film shot in a stereo camera processed or printed at a drug store or online order business that you would normally send in film to to get prints made, the stereo images on your film will get cut into and you will be a sad stereographer indeed.
There was a time that stereo film could get processed and stereo slides mounted, but those days are long gone. Nowadays there is simply no way around it. If you want to shoot stereo film and you want to make stereo slides, you’re going to have to CUT YOUR STEREO IMAGE PAIRS OUT OF THE FILM ITSELF, BY HAND.
This can be the most daunting task out of the entire stereo slide making process and you only get one shot to do it. If your cut isn’t exact, or you cut into your image, there is nothing you can do about it and you must resort to salvaging and masking methods that we will not be covering in this post. Your job as a stereo slide maker is to get the first cut right, every time, 1000% of the time. Every single cut you make into the film IS your first cut into a new section of the film strip. You don’t get a second chance. It might sound scary- and believe me, even to this very day, if I make a wrong cut into what looks to be a killer stereo image, I feel like a the world’s biggest schnook for ruining a potentially excellent stereo slide- but you just have to put those film chips aside into your pile of good intentions and just keep on going and try to make sure your next cut is on the mark.


There happen to be more then a dozen stereo slide formats, each format is a different frame size on your film strip, each one may have a particular stereo slide mount cut to frame their specific format size. In addition to the differences in frame sizes each camera captures, there is also difference in the way each camera captures the images. This varies from camera to camera. Some stereo cameras leave nearly a quarter of an inch space between frames which obviously leaves you a lot of room to make your cut, some literally take each frame butted up against the next to the so you don’t have ANY leeway for marginal errors in your slice.
Have no fear! With a little practice and the right tools, just about anyone can get the process down pat 🙂
I’m writing this post entirely about 35mm stereo slide cutting tools because I recently picked up a few new tools over the weekend that are worth sharing and because it is such a commonly discussed topic between stereo slide makers- how do you cut your film?
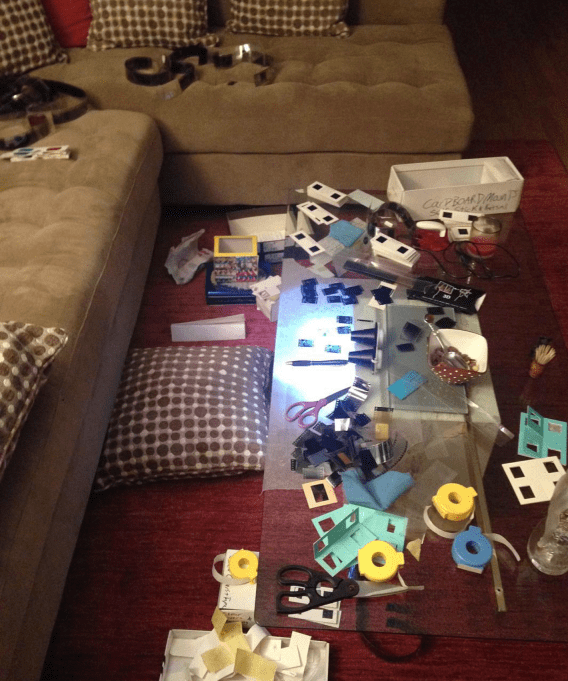
Here is a collection of some of the tools and techniques that you can try when making the cut.
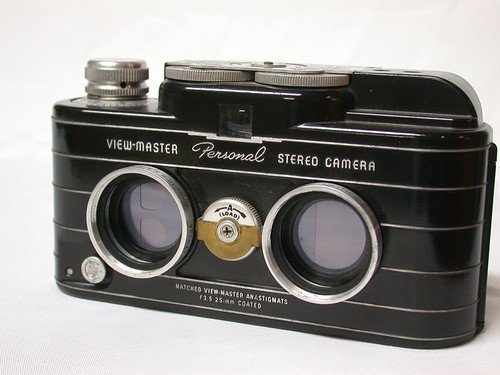
For the most part, images in most 2, 3 & 4 lens cameras will be a straight cut across the film. There are SOME cameras that shoot little tiny chips- like a Viewmaster stereo camera (you need a physical chip cutter to cut out those little tiny Viewmaster chips yourself) & action cameras that has two rows of lenses (those cameras were never intended for making slides so slide cutters were never produced for their formats). We will only be touching on the Viewmaster chippers in this post because it deserves its own post.
Lightbox, Scissors & a Steady Hand.

This might be the riskiest out of all the methods I will be listing, but this is the method that I have personally used to make the practically all of my 35mm slides for the last 20+ years (& perhaps it might show).
Light Source: You want smooth even illumination to be able to see the sometimes very indistinguishable details between two 35mm stereo film chips to make your cuts. I prefer flourecent light the best- in fact I used to own a light TABLE, which was excellent for this task because I could sit down at it like a desk and cut away and had a massive amount of illuminated room on the table top. The top was clear glass so I used to cover mine with a large sheet of vellum which is a very smooth translucent type of paper that can be found at most art supply stores.

A portable flourecent light box is still the standard for stereo slide mounting. I have seen LED light pads that look quite suitable, they are intentionally marketed towards the arts & crafts & photography markets. I have some super flat ones but they have an imprint on the surface which creates a very disruptive light pattern which makes using this type for stereo slide mounting quite difficult. You want a smooth, evenly illuminated surface.
To be perfectly honest, I’ve used a lamp underneath a glass tabletop, I’ve cut slides illuminated against my computer monitor, even holding up to a window or a lamp. I wouldn’t recommend this for anyone’s normal workflow 😂😂 but yes, I’ve done this plenty of times in the past
PRO TIP: Vellum is a translucent, milky smooth paper that can be found at an art supply shop. A sheet of vellum can be cut to any size and fit over your light source and will help to even out any noticable variations of light or surface scratches, etc.

SCISSORS: You will want a straight, sharp & comfortable pair of scissors that makes clean cuts and will not fatigue or cramp up your hand. Once you start cutting a film strip, it’s best to mount through the whole strip in one sitting so it won’t become a confusing project to pick up if you happen to have to leave it alone after starting.
EDIT: It just dawned on me after publishing this article, that a magnifying lens of some sort might be very handy for people who want an easier view of what they are cutting. Page size fresnel magnifying sheets may be a good solution, they are lightweight, paper thin but made from rigid plastic, you can easily stack a few books on either side of your slide mounting area and lay the magnifying sheet on top, and have enough room underneath to work on cutting film, with close up magnified view of your film and cutting lines.
Additionally, many people only handle their film with gloves on, as to minimize any fingerprints that will inevitably transfer to the slide images. A pair of gloves or fingertip coverings ( you can cut the tips off of latex or other stretchy gloves) can pretty much eliminate any potential fingerprints. There is a lot of touching the film that occurs during cutting, cotton gloves, latex or any material gloves might be a wise option and fingerprint reduction may help in the overall archival lifespan of the slide. (edited 4/28/23)
Guillotine Slicer/ Film Strip cutter
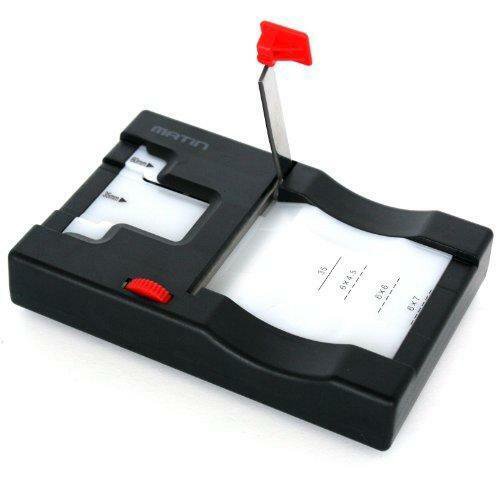

These are everywhere online, you can get them on eBay or Amazon or just by googling. These little units plug into the wall and have an illuminated bed which makes for easy film cutting and eliminates the need for purchasing a seperate light box. They can be used for 120 & 35mm film strip and have markings printed on the side for STANDARD size cutting- remember- stereo cameras do not use normal frame sizing so do not use the printed guides, you will just slice between each frame by lining the edge of the frame up to the cutting blade and cutting down into your film in one smooth stroke. If you blade is DULL (this is the main reason why I use scissors, I often buy used equipment and the blade might be dull) you CAN sharpen it with a sharpening stone or rod, the same as you would a kitchen knife. They usually all have a film advance wheel, that will advance the film to the next frame.

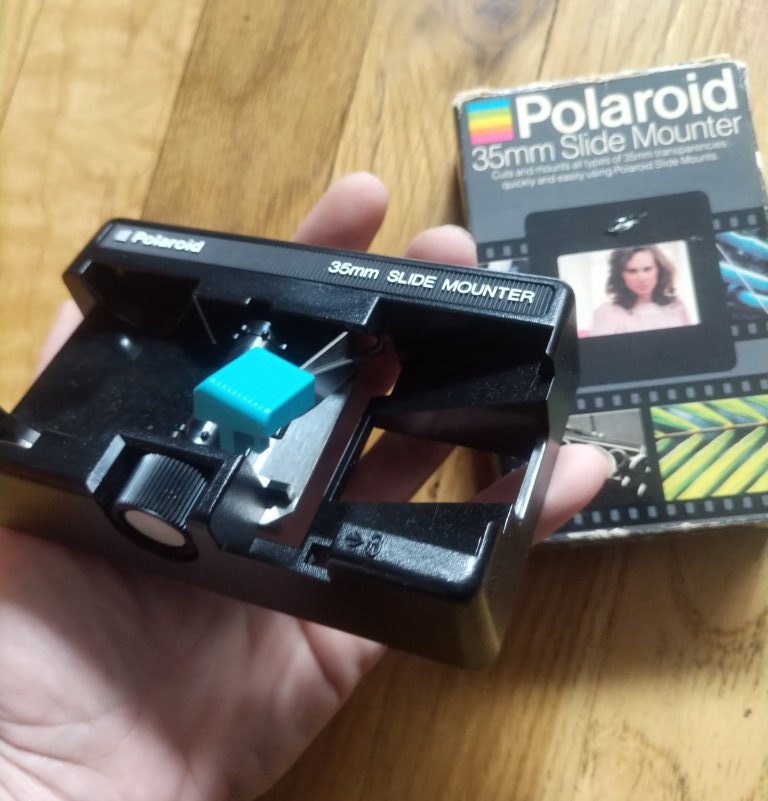
There have been quite a few branded film slicers made specifically for cutting realist format slides in the past (the stereo realist was SUCH a ubiquitous stereo camera that it’s frame size became a standard format, which is measured as a 5 perf sized image). Stereo Realist made one, in fact they made a whole slide mounting kit with a slide chip organizer, a heater for heat seal mounts etc.. Below are photos of the Realist brand cutter and kit, as well as the Lutes brand. More info on that cutter and the man behind it can be found here on Susan Pinky’s website https://archivesusie3d.wixsite.com/3-dlegends/harold-r-lutes
The only problem with any vintage cutting equipment is the blade might be dull. This is especially problematic for film “chippers” like the ones made especially for Viewmaster chip making which I only touch on in the bottom of this post. The blades on vintage guillotine cutters are often dull. When a blade is too dull it might not even cut through the film at all, it will just make a permanent bend in it or tear it. If this happens to you, simply stop using it. You might want to try to sharpen the blade yourself or perhaps a take it to local hardware store if you are really trying to restore it to a usable state, but I would recommend using different method or buying a new cutter altogether.


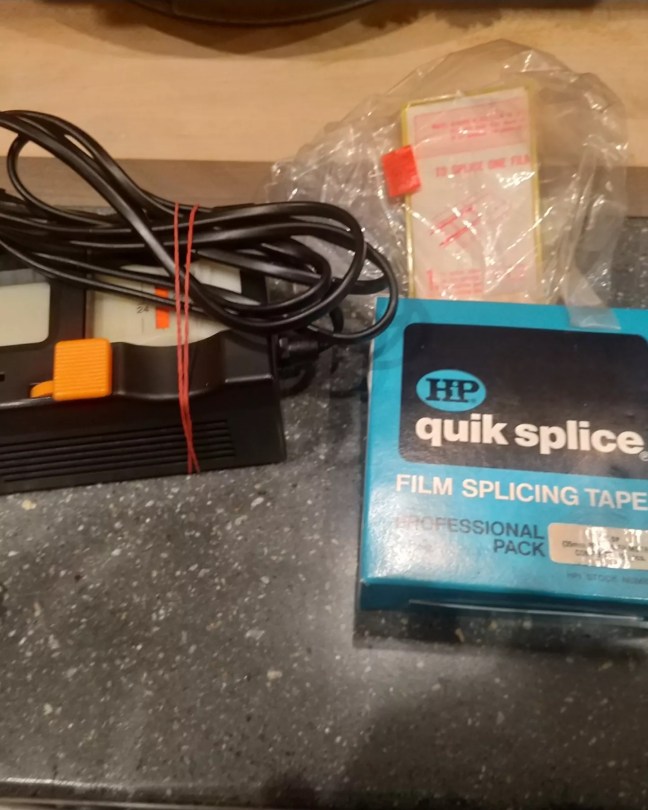
“Film splicers” used for old 16 & 8mm movie splicing usually also have guillotine cutters, and usually have an illuminated bed. I have used those in the past as well (if they could fit a 35mm film strip), and these are also considered the same type of “guillotine cutter”.
Razor Blades & Guides
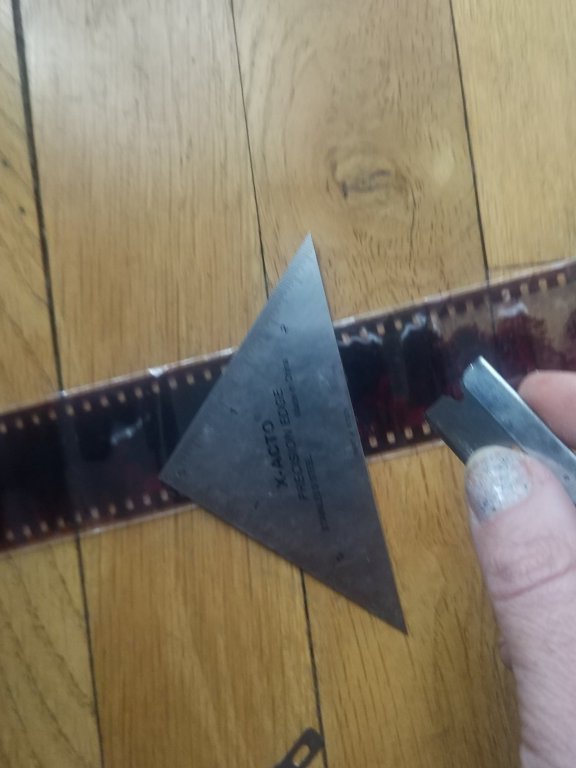

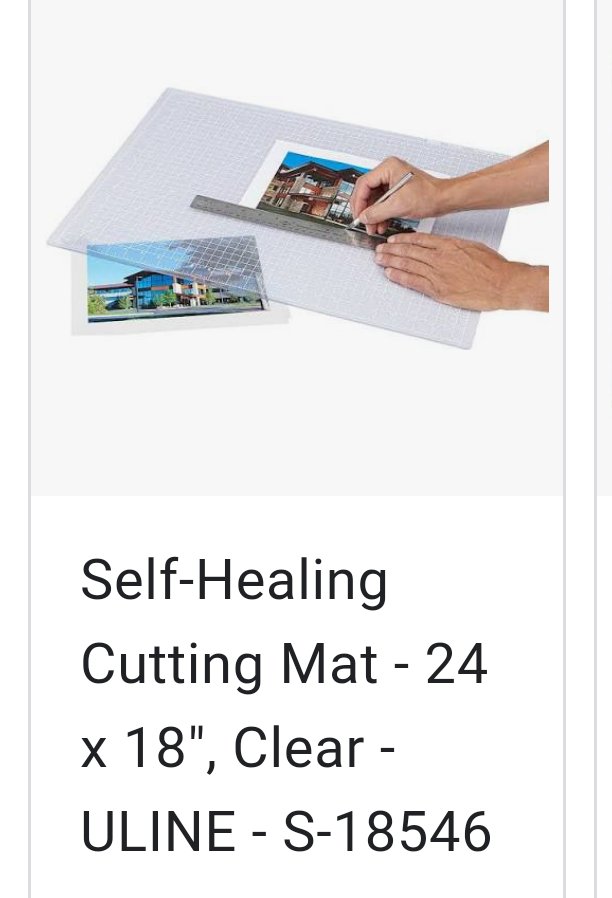
Razor Blades, cutting surface & straight edge: There are MANY different types of razor blades and razor cutters- straight razors, exacto blades, box cutters, etc… as well as rotary cutters, which are circular blades with a razor sharp edge and they roll over the surface of what you are cutting. I generally do not use any sort of razor cutting method because you cut down through the film and into the surface of whatever you are cutting against, even a glass tabletop will get marked up with razor cuts. If you are hell-bent on using a razor, I would suggest using a translucent cutting mat specifically designed for razor cutting. You will also need a straight edge of some sort to draw your blade down against for a straight cut. Any quality stainless steel ruler or straight edge can be used for this. If this is the method you choose I suggest covering the bottom side with a self adhesive piece of felt or fabric as to not scratch or mar up your film when making the cut, any little scratches you get on your film will be noticable when you view your stereo slide in a handheld magnifying viewer or for polarized projection.
I only even mention this razor technique because I recently purchased a cutting jig especially made for razor cutting film. It is a tried and true method for SPLICING motion picture filmstrips, such as old 8mm or 16mm movie reels, so in theory, razor cutting is an option that might be a method some people prefer, but it is not a technique I have normally heard say of for being a method used by stereographers for slicing out a L & R image from film to create a stereo slide.


Film Splicing Jig: This is a film cutting tool that I have never used before and will have to report back on- I picked it up this past weekend. It is a plastic jig, with a recessed channel for 35mm film, sprocket hole guides to align and hold the film down (kindof) and a recessed cutting slit down the center which acts as a razor guide to manually slice your film with a common disposable razor blade (see the illustrated instructions I included in the right photo). It looks like it may provide a decent cut and allows for any disposable blade to be used which means you can always use a fresh sharp blade 🙂
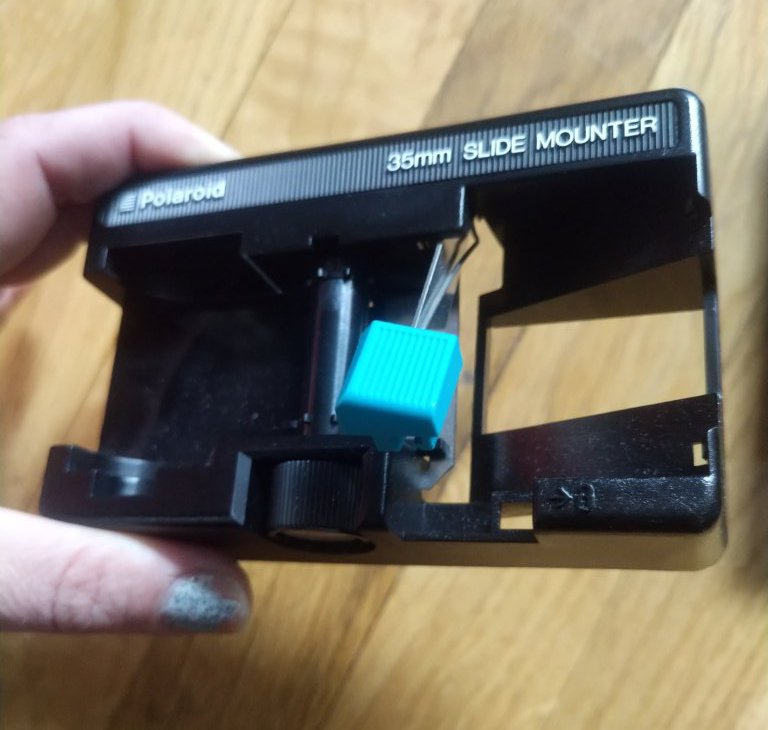
Viewmaster Format 35mm Stereo Chip Cutters


The Viewmaster reels you might have enjoyed as a kid (or an adult) are actually made from film chips that were manually cut out of processed chrome or positive transparencies.. they require a special chip making cutter and not all chippers work for all Viewmaster cameras. I am only briefly mentioning them in this post because they ARE captured with stereo cameras that DO use 35mm film, but this will require a seperate post in order to cover all the details involved in Viewmaster format cameras and chip cutters. They can be very pricey, usually between $200-$400 and the blades might be dull as they are all vintage cutting equipment- no one has ever manufactured a modern Viewmaster format chip cutter.

I hope this post is helpful to anyone wanting to start getting into stereo slide making, or even to more seasoned stereo slide makers. It is a format that is absolutely more rewarding then the apparent pain-in-the-butt workflow that is needed to create them. It is still, to this day, one of the most impactful and transformative of the stereo formats, which is why even with all the options available for creating and sharing digital stereo images- there are still people who actively make these absolutely time-capturing 3-Dimensional images.
If you have a method that wasn’t covered in this post, please reach out to me via DM on Instagram, I have a direct link to my account below. There really aren’t that many methods listed in this post so I would be very excited to hear about any old or new techniques I am unaware of 🙂
The PARALLAX-SHIFT Stereo Club often hosts special meetups just for stereo slide mounting- if you are ever in NYC feel free to reach out to us, we would be thrilled to pass down this very endangered skill, which was once a cornerstone of stereo image making and distribution. You can always send me a DM on my Instagram account Parkitlikeitshot and I would schedule something especially for you 🙂
Happy slicing everyone!-
-ilicia
